Despite what you’ve heard, you don’t need to hire an artist or know Adobe Photoshop that well to create your own stream overlay. You can do it for free and get it done relatively quickly. In this tutorial, I’m going to show you how to create something simple that will give your stream a little more polish without making you pull your hair out.
Step 1
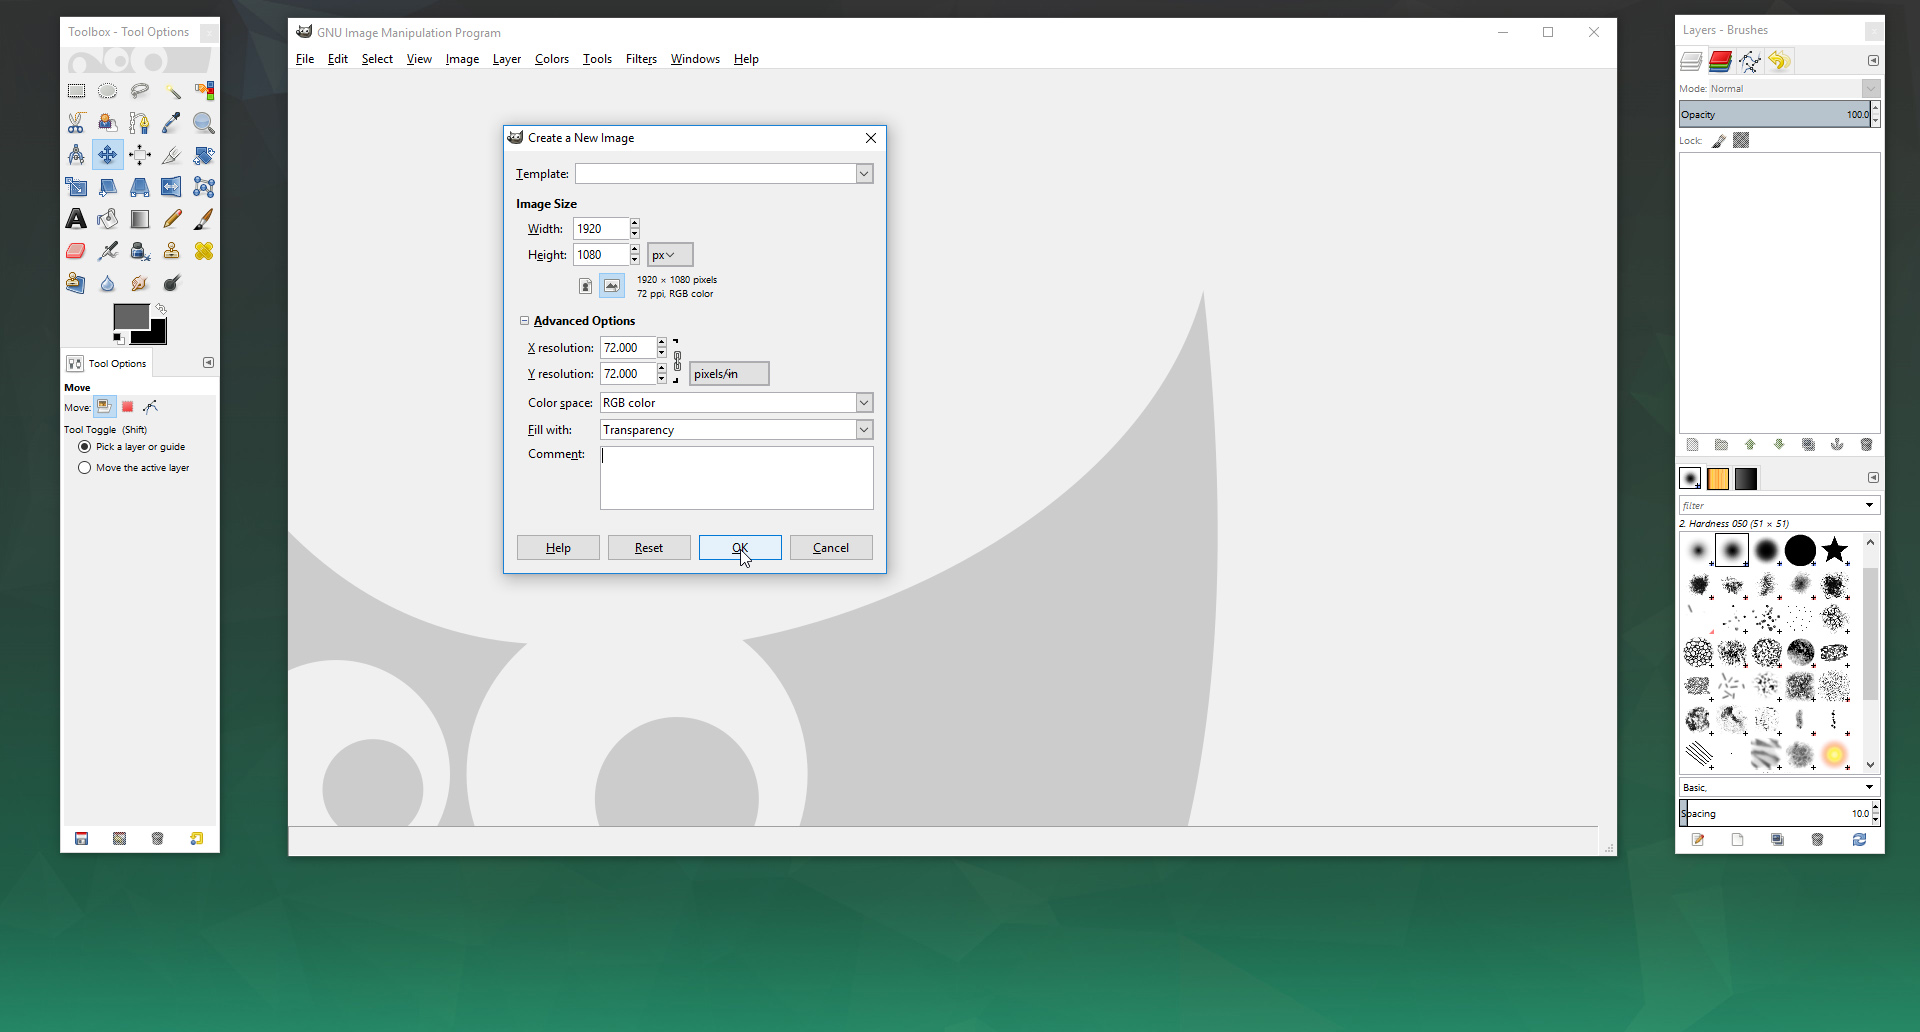
The first thing you’ll need to do is download GIMP. It’s an image manipulation program akin to Adobe Photoshop but free. Once you’re done installing, you’ll then need to make your canvas. You’ll want to go to “File > New” and then use the following settings if you’ll be broadcasting in 1080. If not, you can set the canvas to 1280×720. Remember: you can always scale down an image or overlay without losing quality but you can’t scale up. Be sure to click “Advanced” if you don’t see all of the options too.
After that, you’ll then want to grab a screenshot from whatever game you’re playing. This will ensure that you’re placing your overlay in areas that won’t cover key elements of gameplay. Make sure the screenshot is up-to-date (i.e. DotA 2 changes the HUD around from patch to patch) and also make sure the dimensions match the canvas size (1920×1080).
Step 2
I’ve chosen to use Hearthstone so I went ahead and copied over a screenshot from Google Images and pasted it into my canvas. Now I need to decide where I should put my webcam. The top right area is a common location and I know it won’t cover anything up important so I’ll choose there.
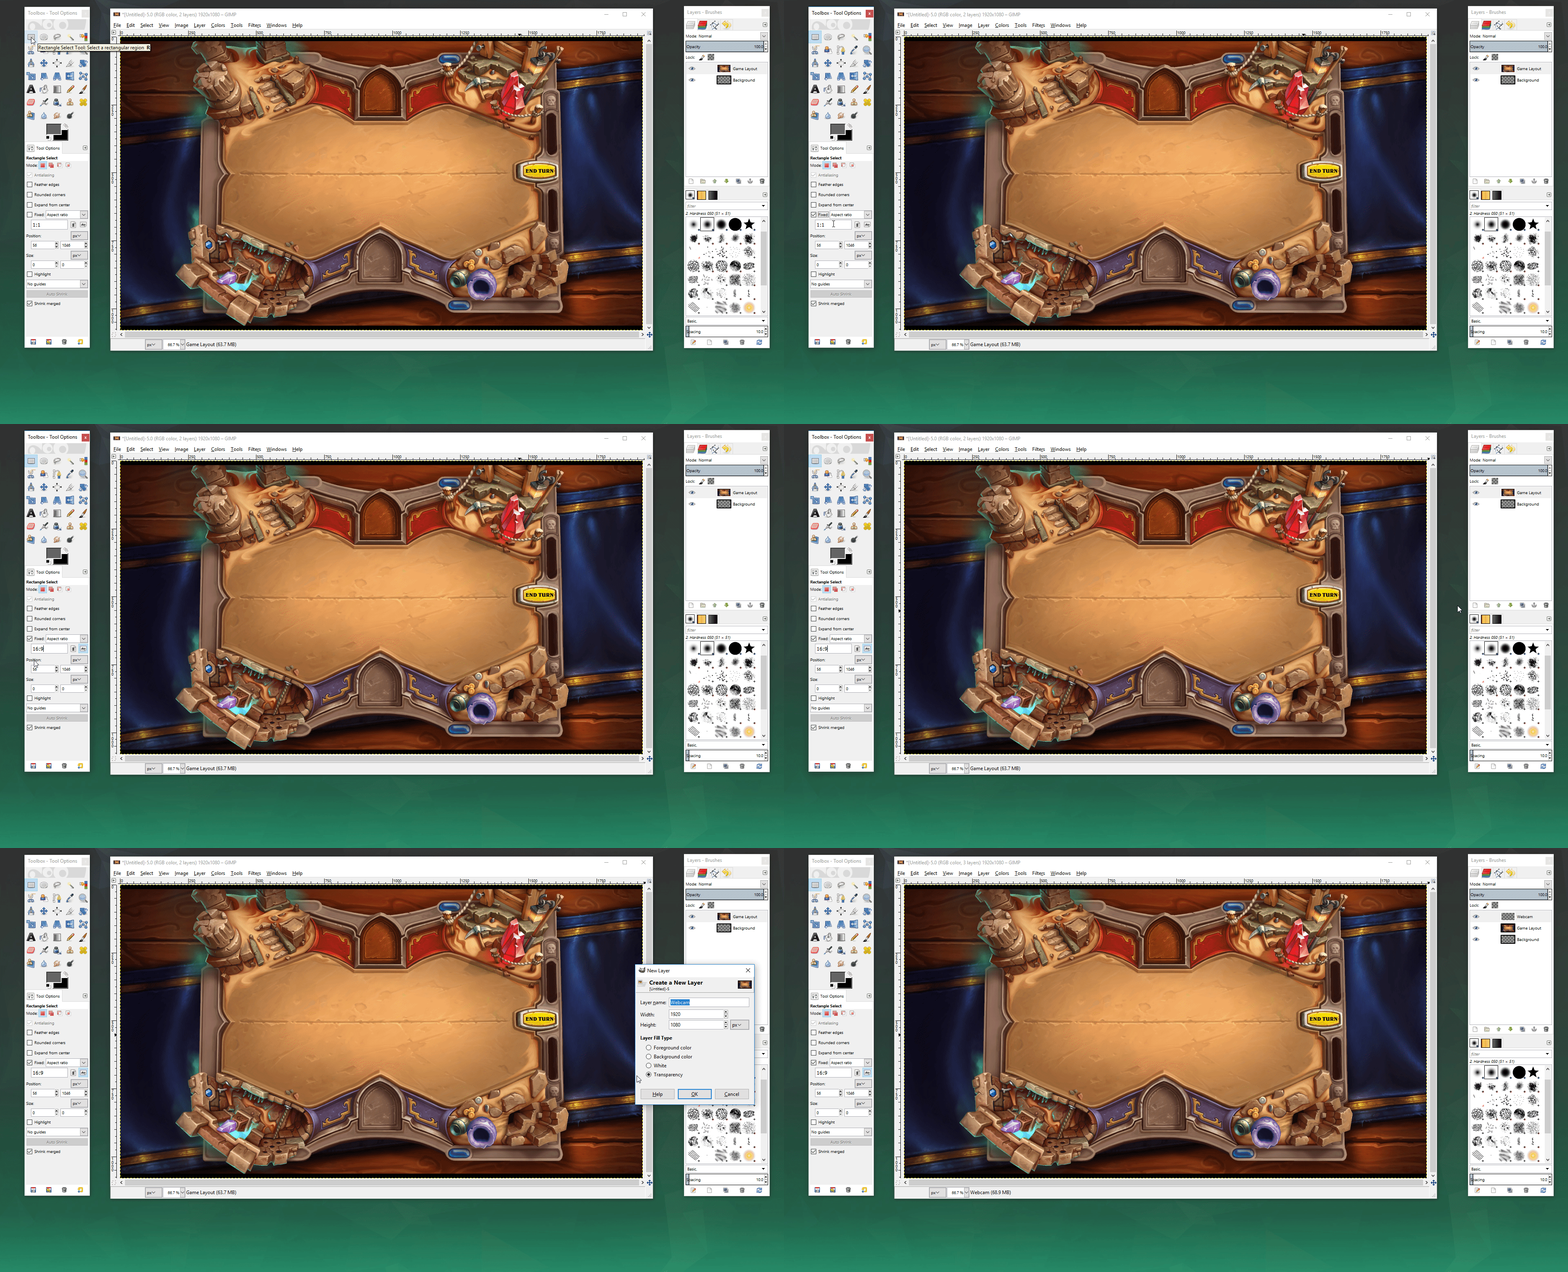
If you’ve got a 16:9 webcam then make sure you have that aspect ratio selected. If you’re working with a 4:3 webcam then use that respectively. Lastly, make sure you’ve selected “Transparency” as an option before making your new layer too.
Step 3
I’ve chosen to use black and grey as colors because they’re simple and look clean when a gradient is applied. If you’re looking to be a little more adventurous, check out a color palette generator like Paletton for ideas.
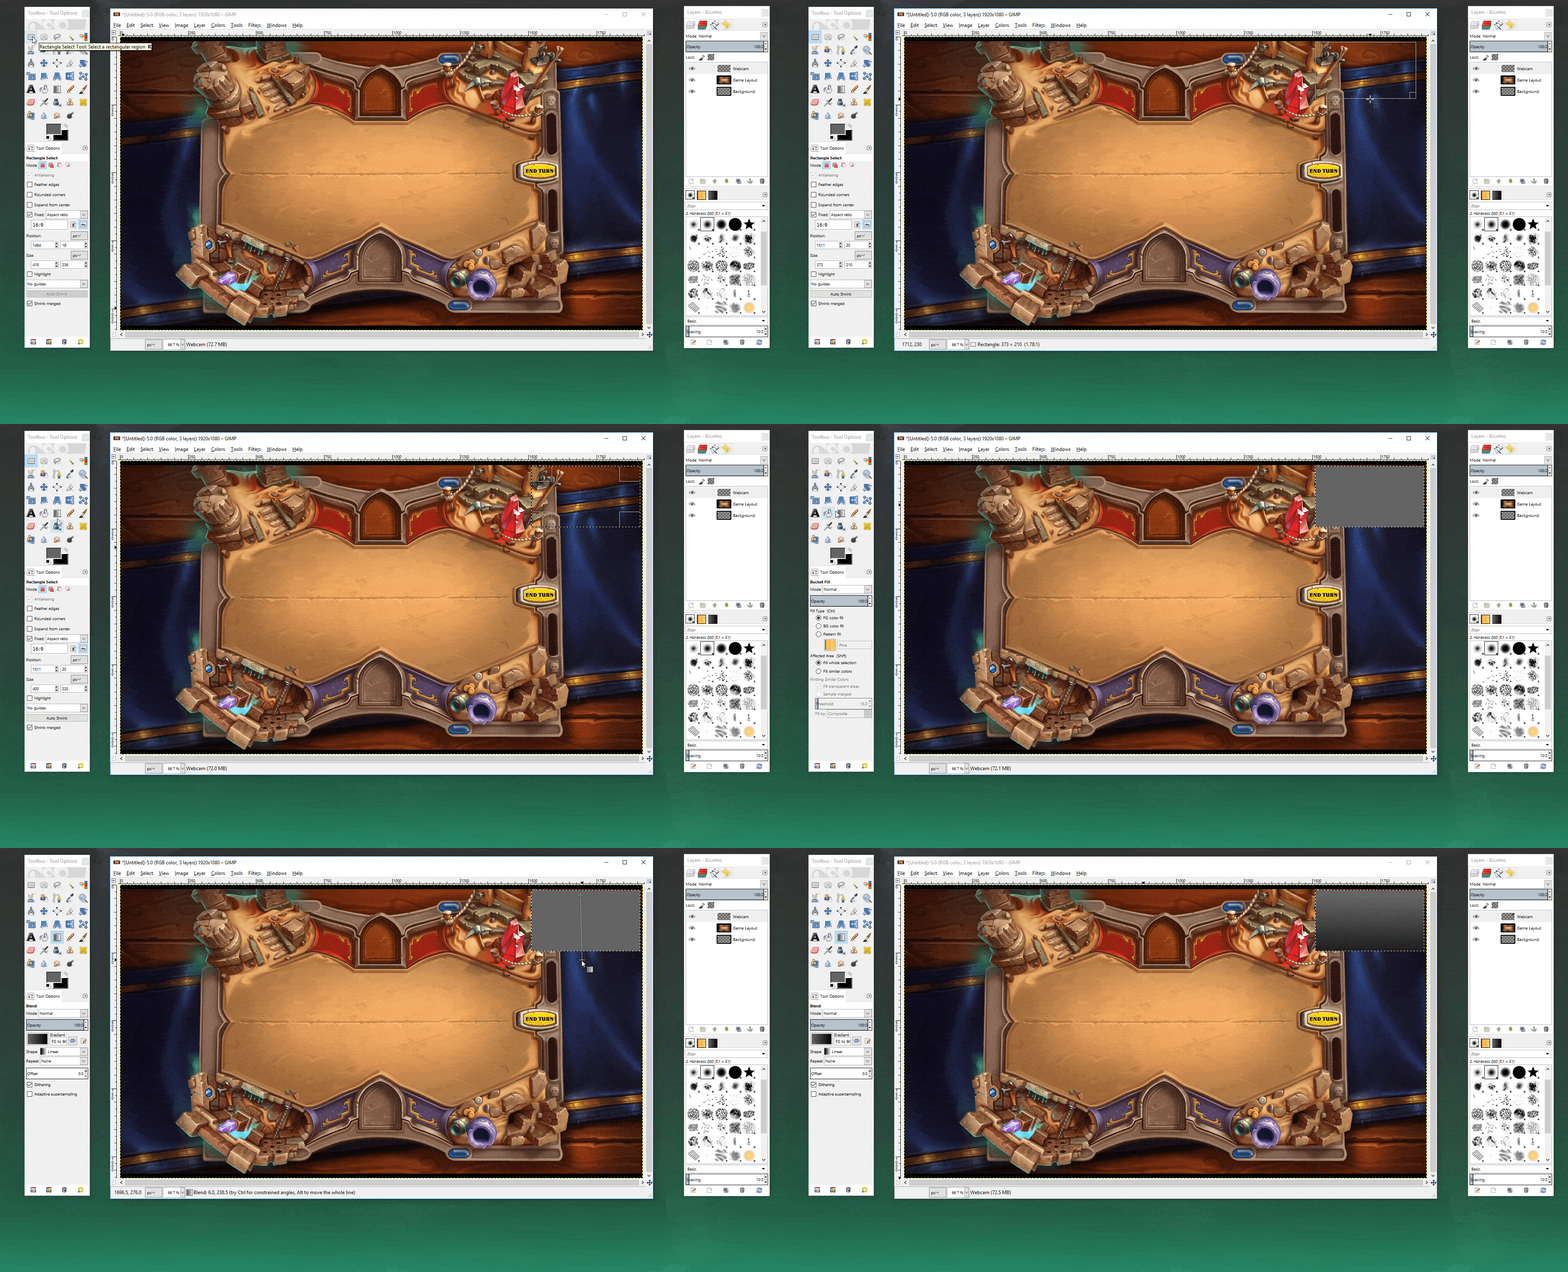
Don’t be afraid to play around with the gradient tool too. Remember: you can always revert a change (CRTL+Z) if you don’t like it.
Step 4
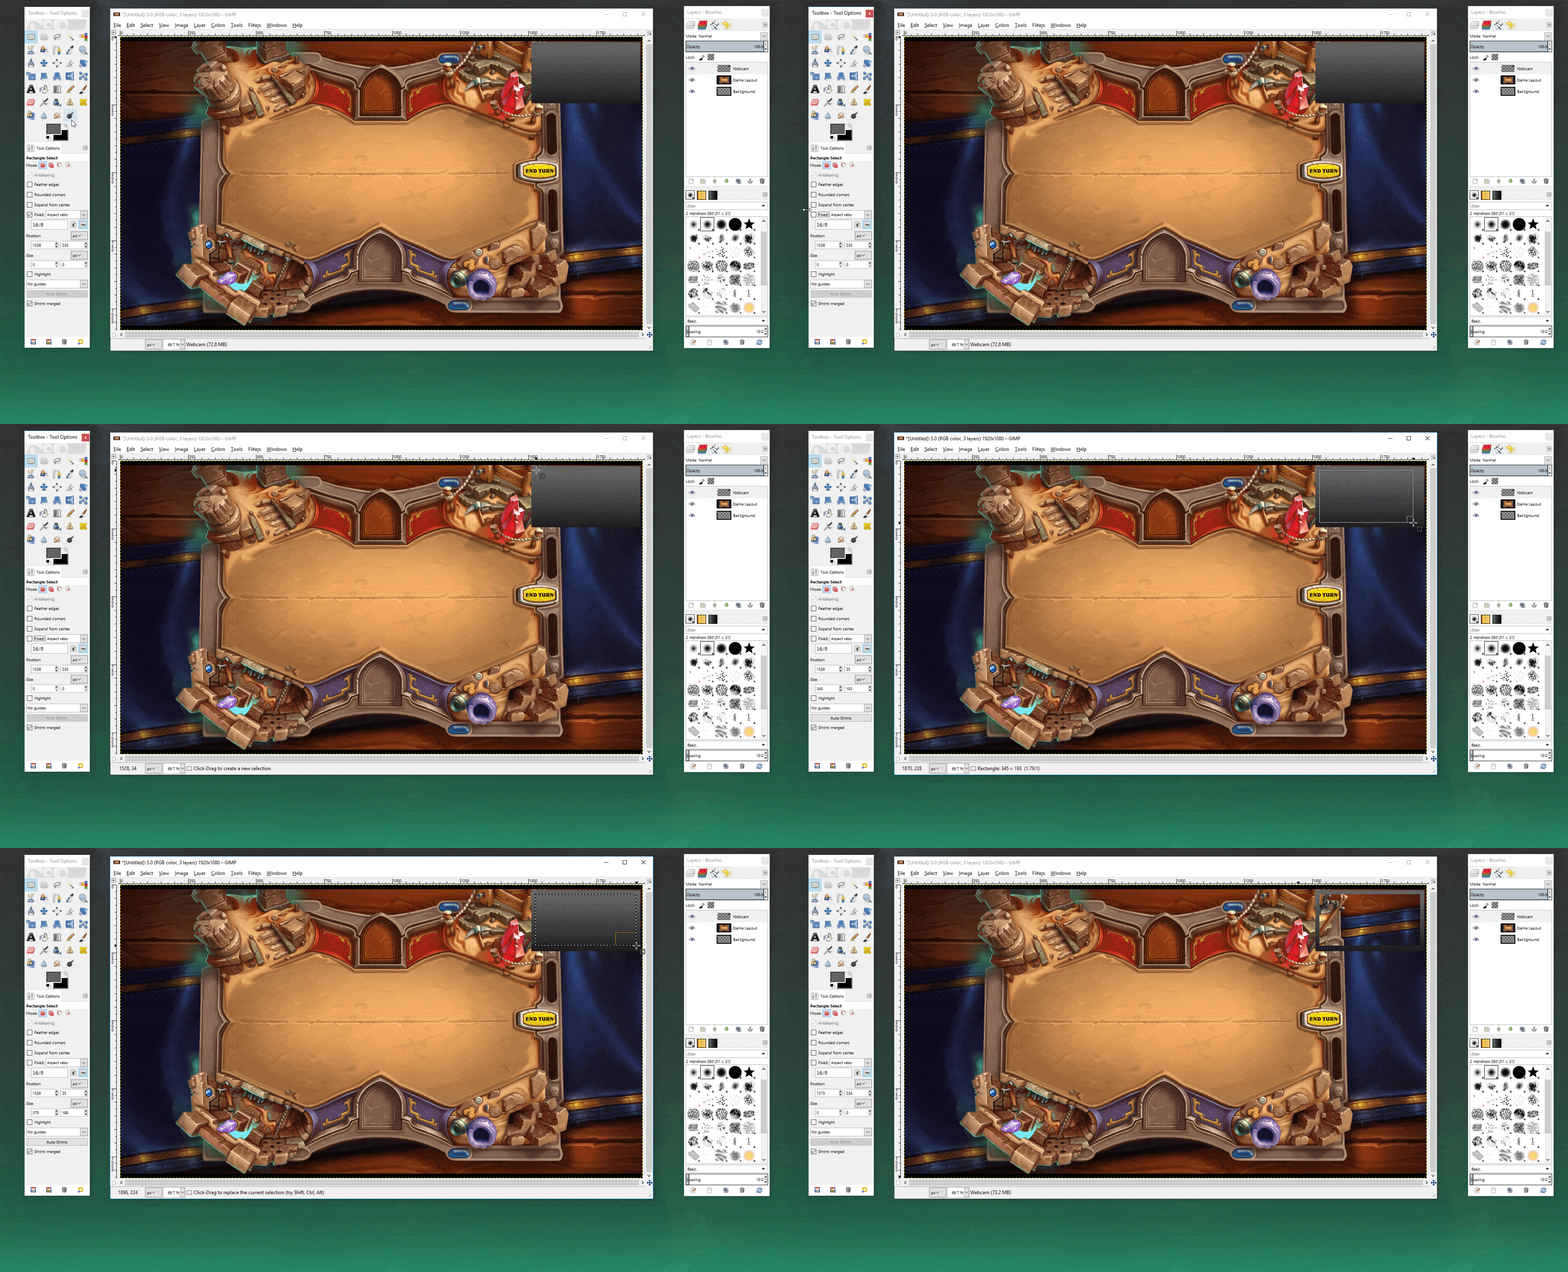
You’ll then want to “hollow-out” your webcam frame. To do this, uncheck the fixed ratio checkbox and then select about 90% of the inner area of your webcam frame. Then click “Delete”.
Step 5
Now we’re going to make our social bar or ticker. This area will contain where people can find you on Twitter, YouTube, etc. and we’ll leave room if you want to include a text-file or two later on.
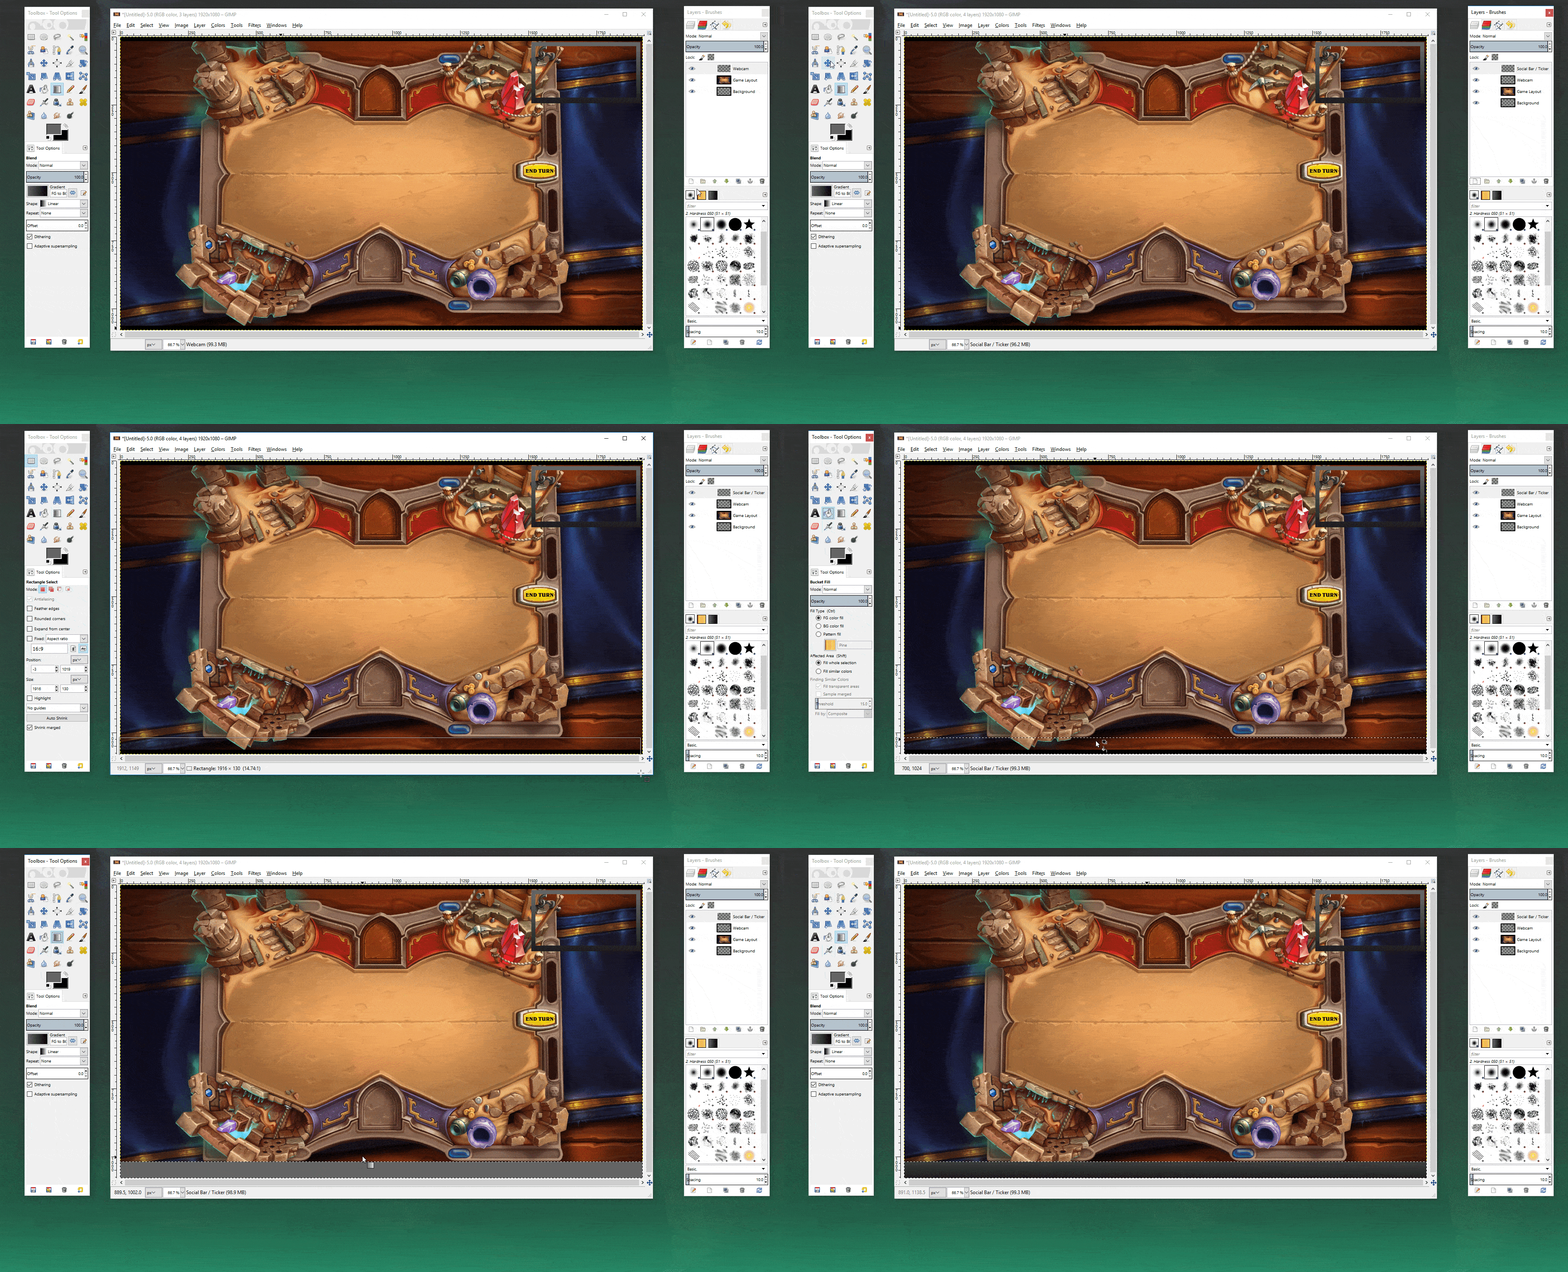
Notice how the height stops at the mana bar (right near the purple vase for all you non-Hearthstone players). Always remember to not cover up valuable HUD elements!
Step 6
I’ve rounded up a few popular social and video platform logos that you can download here. If I missed any though, be sure to look for transparent .png’s when downloading from Google Images. Choose whatever you need and then copy and paste into your scene.
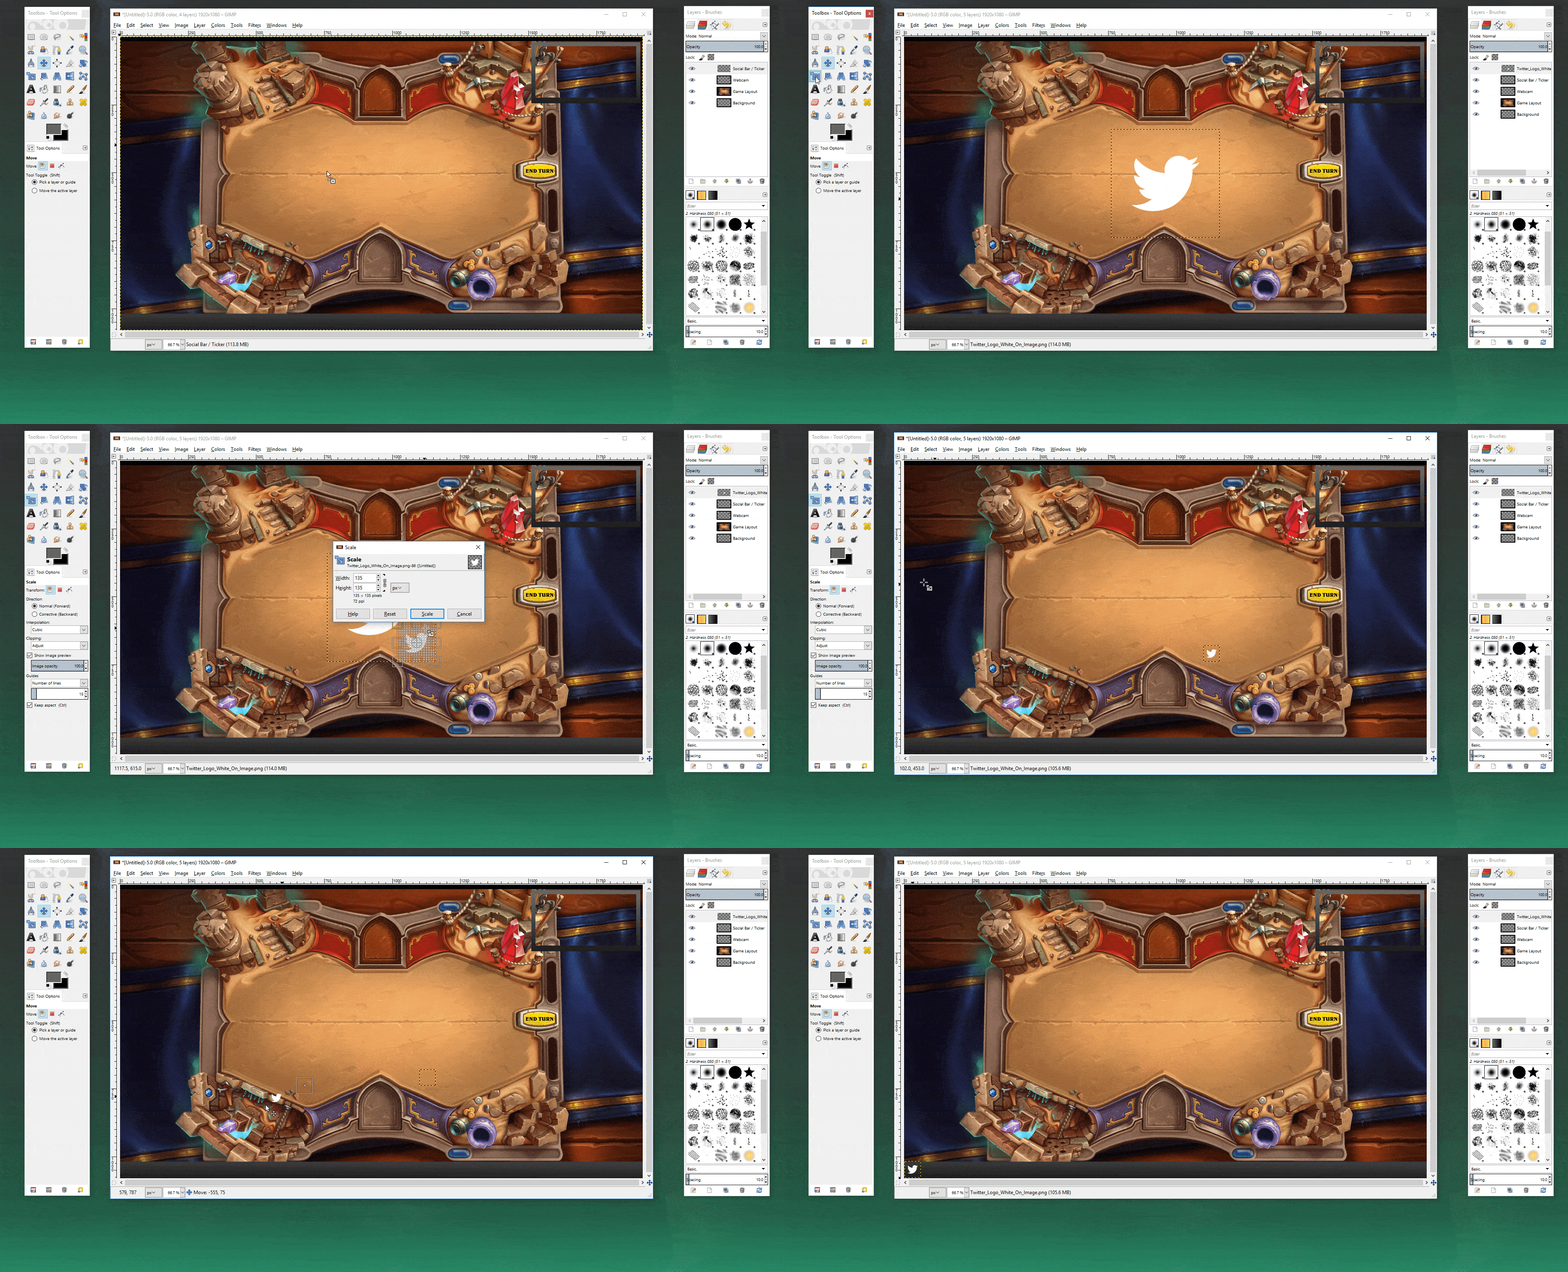
Scale the logo(s) down so that they’re now smaller in height than the social bar. You don’t want them to “bleed” over.
Step 7
Using the Text Tool (T), you’ll then click to add whatever text you’d like to appear next to your social image(s).

Be sure to scale your font up as need be and move it so that it’s aligned with your social image(s).
Step 8
Almost there! Now you need to hide the game HUD and export as transparent .png.
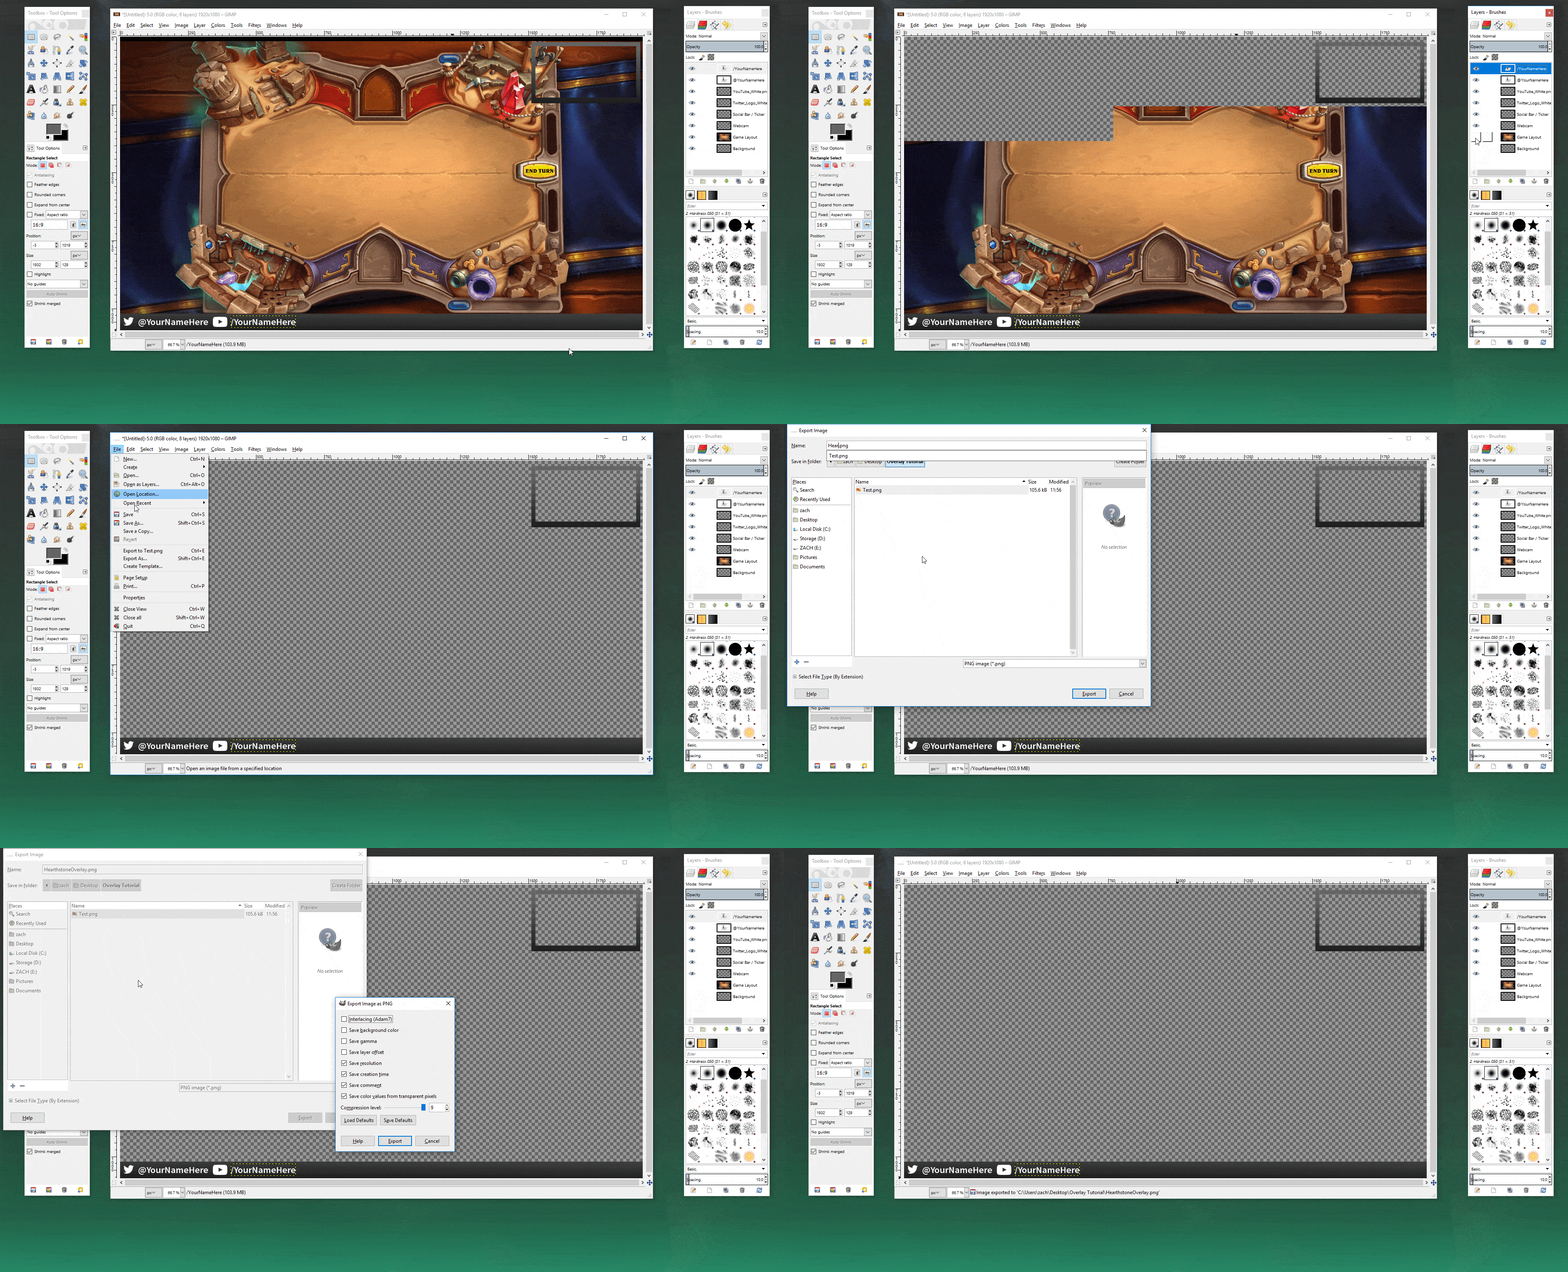
When exporting, make sure you’ve de-selected the “Save Background Color” to ensure transparency.
Step 9
All that’s left is to bring it into your broadcasting software. I’m using our own to demonstrate.
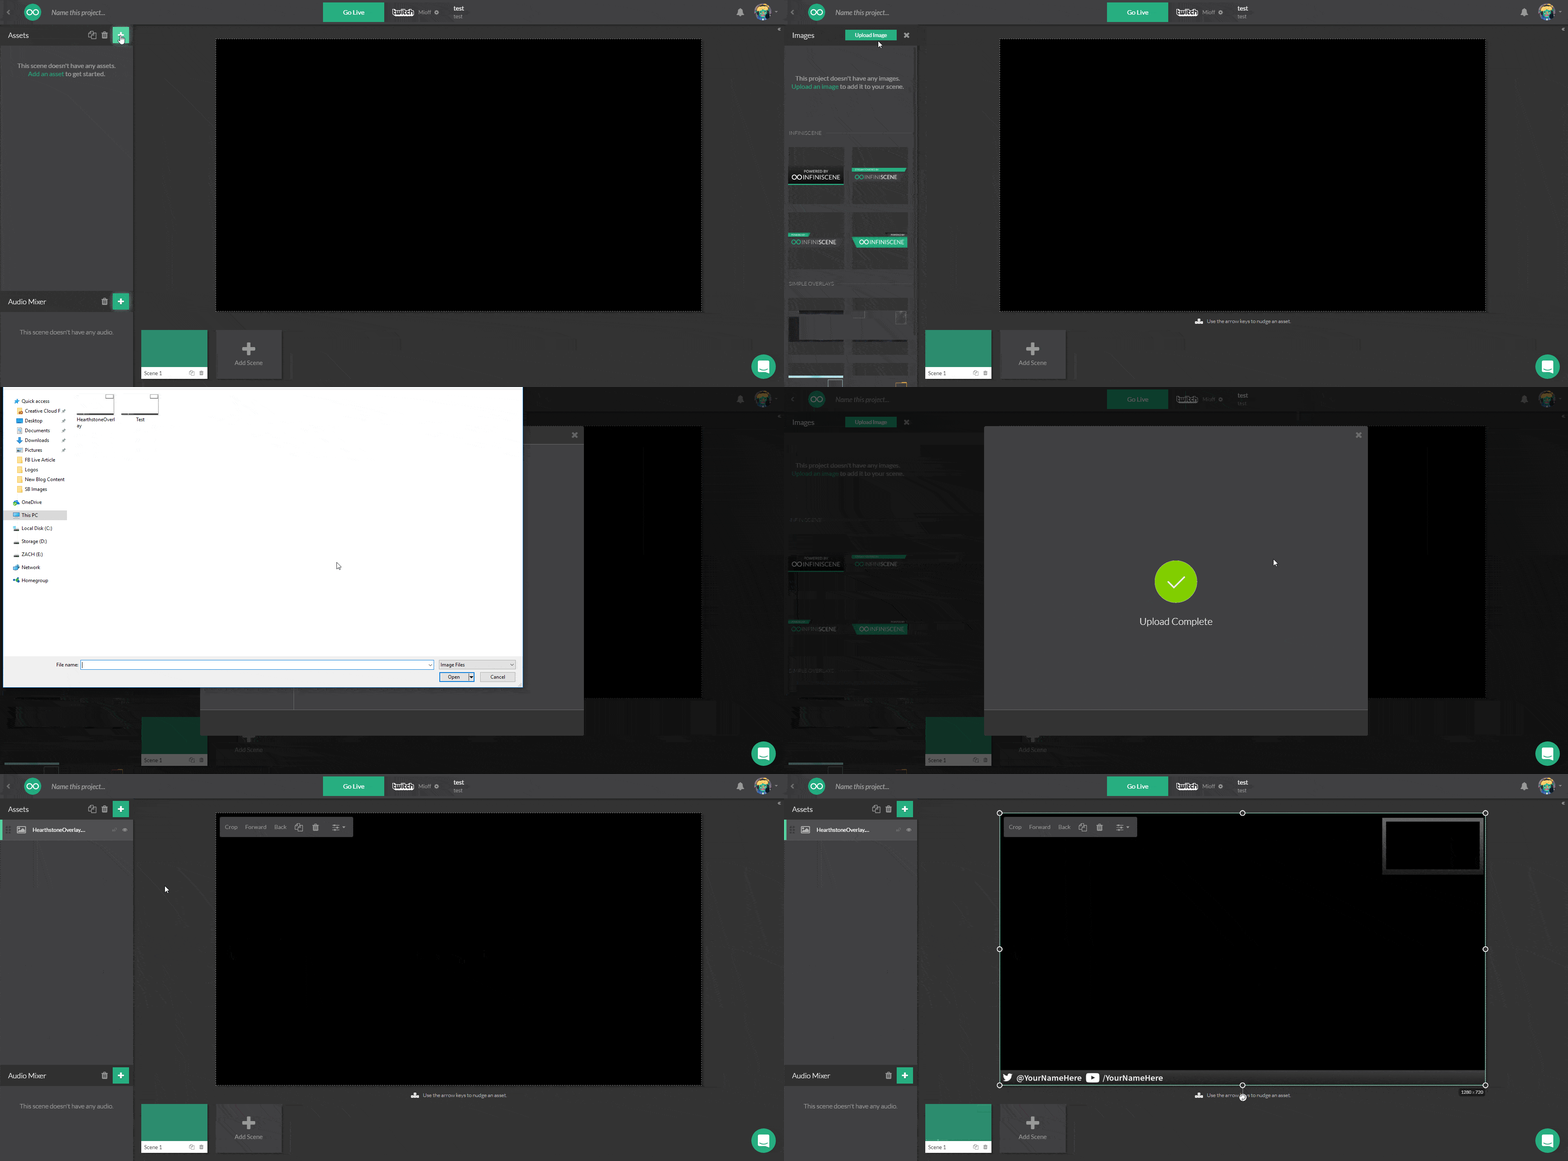
Boom. Just like that, you’ve got your overlay. If in the event you’re not happy with you’re own creation then remember, we do also offer free overlays in our filepicker. All you have to do is go to Add Asset > Image > Upload Image > and then navigate to the “Lightstream Overlays”. Hopefully you found this tutorial helpful and if you’d like to see more like this then let us know!


