Looking to stand out from the crowd even further by customizing your webcam?
In this post we’ll cover how to add visual filters to your webcam with software like Snap Camera, use a DSLR camera in your project, and even remove your Green Screen to replace the background with the help of OBS Virtual Camera:
Camera Filters
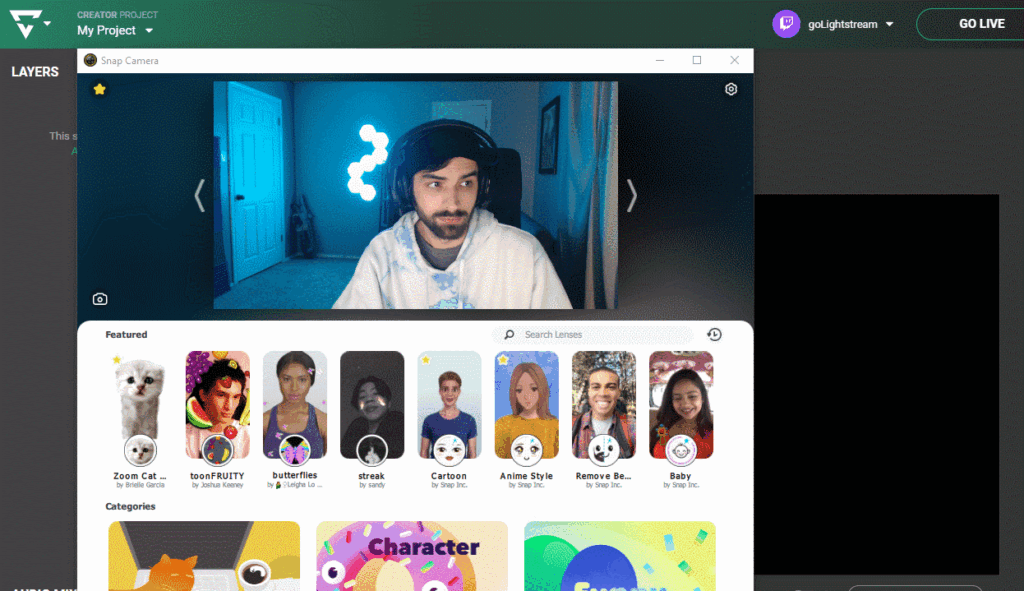
Adding custom filters can be done with the help of additional software, for this tutorial I’ll be using Snap Camera. But you can use other software as well.
First thing you’ll want to do is get your software installed and launched. Then you’ll want to run through the setup to add your webcam. Once the program has accessed your camera you can select the filter you want to apply.
Now that your filter is applied to the webcam in the software, you can add it as a camera layer in your project’s scene. You can even go back to make changes to the filter and it will automatically update in your project. Some software can also be used to blur or replace your background through a similar process.

DSLR Cameras
Adding a DSLR camera to your project can be done through software or with hardware. For this example we’ll be using a more integrated hardware solution with an Elgato Cam Link, however, you can also add it through software like SparkoCam.
First, you’ll want to get your camera set up and plugged into your computer.
Now, turn on the camera, select it from your list of cameras in the software, and then add it to the project’s scene as a camera layer.

Green Screen (Chroma Key) & Background Replacement
Removing and replacing your camera’s background can be done through software or with additional hardware . In this case we’ll be using OBS Virtual Camera.
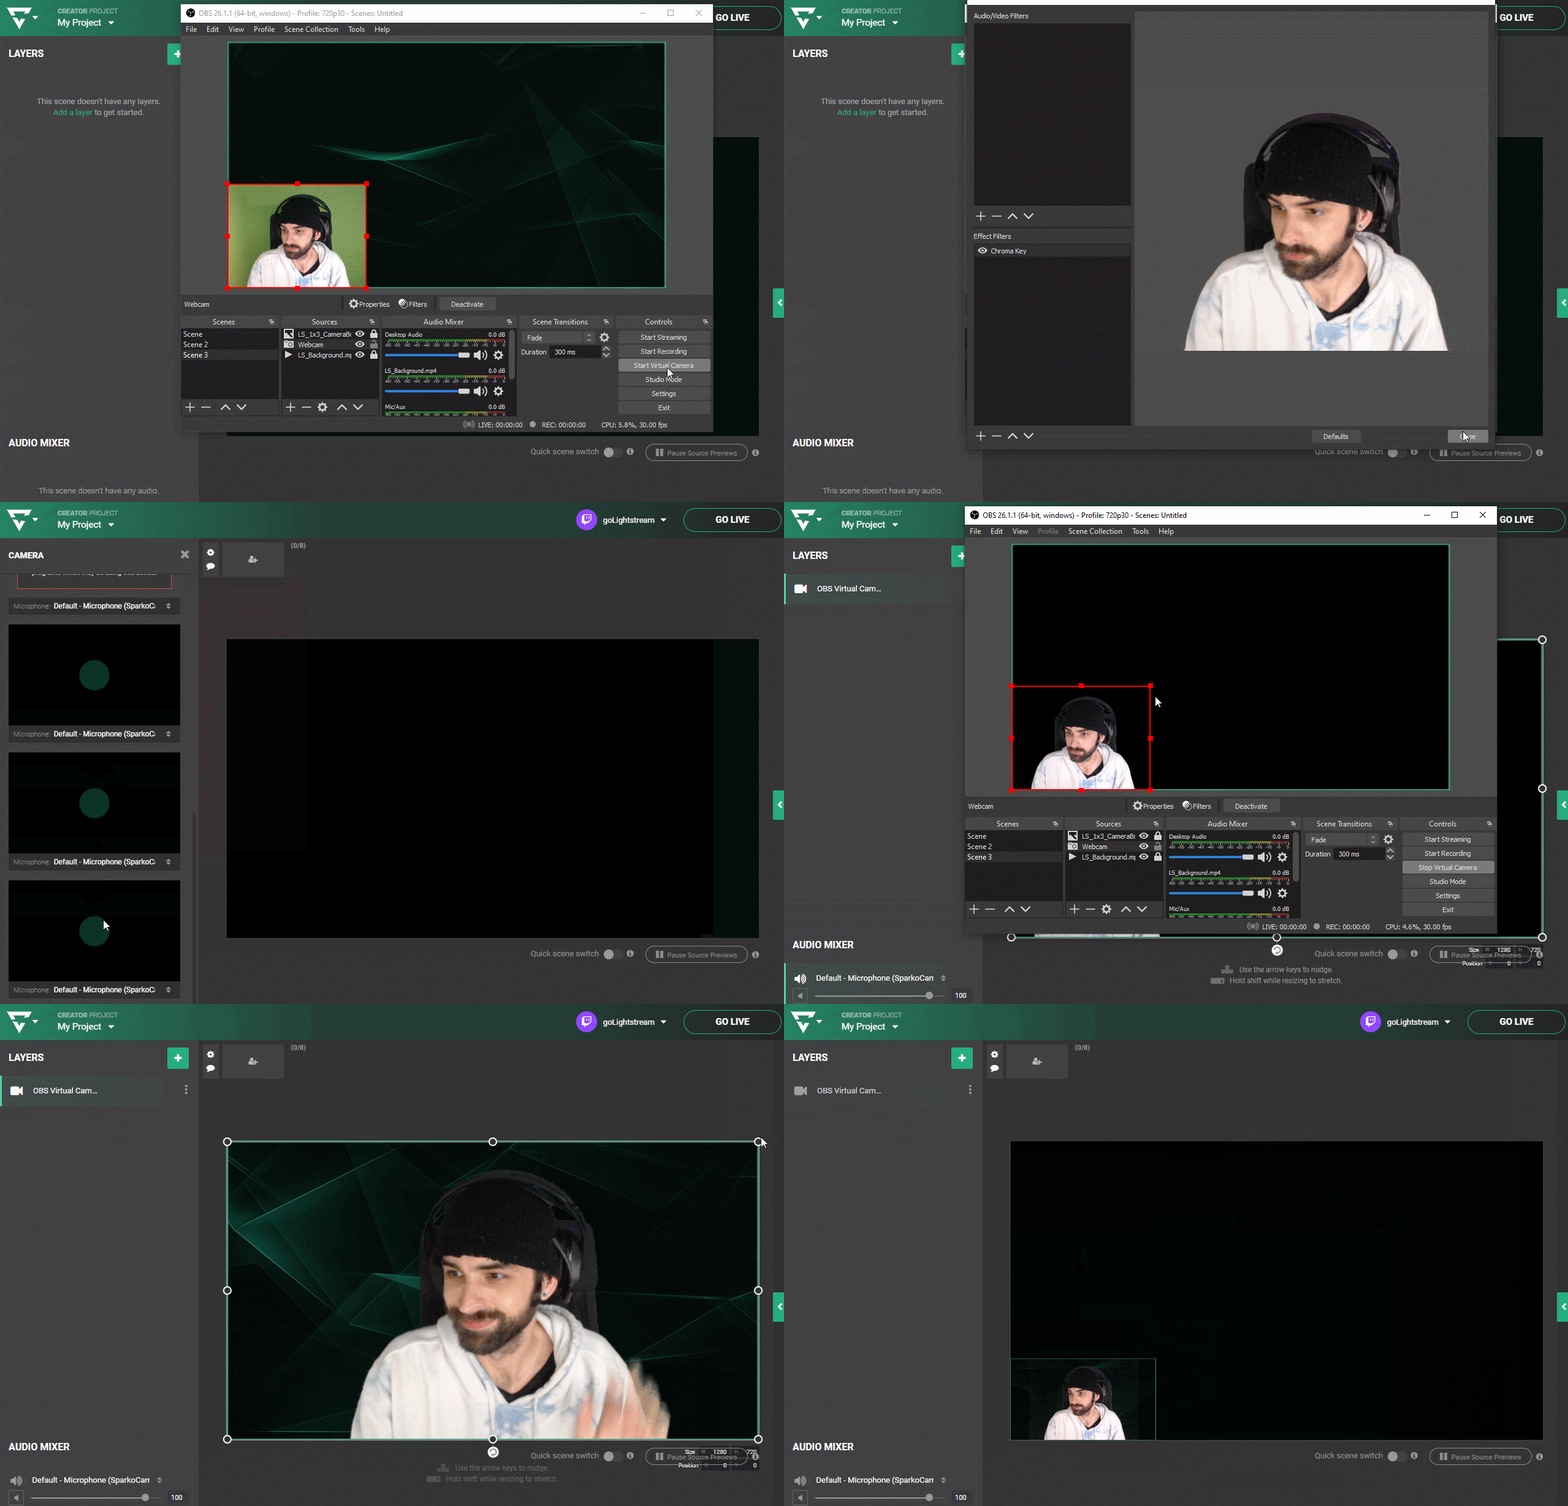
The first thing you’ll need to do is install the latest version of OBS. Then you’ll launch the software and set up a scene that has your camera source added to it in fullscreen. Next you’ll use the “Start Virtual Camera” button inside of OBS to activate the virtual webcam on your computer. Remember to apply the Chroma Key filter to your camera and add the replacement background source to OBS before adding the virtual camera to your project’s scene.
Just like with the Snap Camera, it will update in real time with any edits you make in terms of positioning and sizing inside of OBS.
Note: Because our webcam layers don’t support an Alpha channel you won’t be able to fully remove the background of a Camera layer, only hide and replace it. For our Creator users streaming their computer content though, they do have access to another layer type RTMP Source that can completely remove their background before transmitting video to your project.


